Building a Custom Roll Cage
Adam Jabaay

of course i'm writing about an old Honda. I have a problem. duh.
Rollcages are an important piece of the puzzle of a racecar build. So many people buy a mail order pre-bent cage setup, pay some random dude with a welder to do inadequate welds, and show up at events. I've seen too many mediocre quality rollbars and rollcages, especially in the last few years as welders and equipment costs are getting pretty low.

excellent overall fitment can be seen in this pic. Roof, B pillars, etc.
Recently, Mike from Red Mist Automotive sent me a bunch of pictures of his most recent rollcage fabrication project for another friend of mine and Gridlife participant, Nick Rowan, so I thought I'd share those and my thoughts on the topic.

fitment aint bad!. good job on this one mike.

Mig welding isn't as clean and classy as Tig, but works well, especially for rollcages. and it saves lots of time. Red Mist prefers Tig, but it gets pricey due to labor. Proper penetration and heat are Important. Don't make a cage your first welding project.
Mike does excellent work and I was happy to share these pics with you, and do a series of articles on how to approach rollcage building/how to review a cage for those purchasing a car that is already built, etc. Fabrication of a rollcage or rollbar setup requires some expensive tools still, and a bit of knowledge of how you want it to turn out, and WHY you want it the way it should be. There are a lot of "styles" of rollcage (specifically door bar setups), and we won't get too into the varying types of door bar setups in this article, instead, we'll talk about how to approach overall design, and why you should definitely consider hiring a professional (like Mike) to build one if you are AT ALL confused about what you want the outcome to be.
the door bars here are a sill-bar/protruding-X design, and I've seen Mike use this on a few cars. its a pretty well thought out design, with a lot of load paths for the force to travel in the event of a T-bone or sliding into a wall or tree. These bars nearly touch the factory door bars inside the door as well.
My first few rollcages (rollbars actually) sorta sucked. Everyone does a few turd setups before getting semi-proficient, I'm sure, but my friends and I bumbled through a few, because, well, we were lacking knowlege. I had a good welder, that was a plus. I did not have a real Mandrel pipe bender, that was not a plus (those cheap ones at the store are not mandrel benders. they crush the tubing, distorting it a bit, and ARE NOT FOR BENDING ROLLBARS WITH). I bought a pre-bent rollbar kit (a "drag style" kit), and started putting it in my hatchback. What a terrible idea (this was 12 years ago, don't judge too harshly, it has since been chopped out of the car).

more good fitment and overall design here. Obviously not a WILD setup, but a very quality design, with all the most important elements
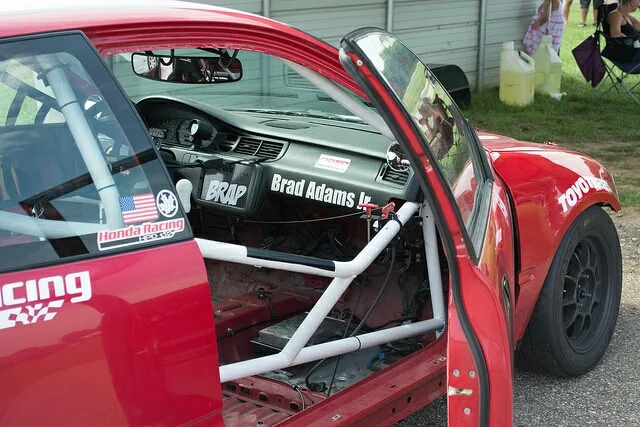
a simple passenger side door is the direction we went with Brad Adam's H2 car. It protrudes to the door skin, and the sill bar connects to a reinforcement that heads towards the rear shock tower.
First, you need a proper material to build out of. ERW (electric resistance welded) tubing is NOT WHAT YOU WANT for any road race cage, and all the cheap pre-bents are made out of this stuff usually. ERW is not as strong in compression, bending, and all the other forces you subject a rollcage to when flipping it over and crashing into stuff, and it has been known to split wide open down the seam (I haven't seen this , or pics, but supposedly its a thing). DOM (drawn over mandrel) tubing is the normal standard for rollbars and roll cages, and it isn't much more money than ERW material, so, don't cheap out here. SCCA, NASA, and almost all other sanctioning bodies spec DOM and specifically outlaw ERW.
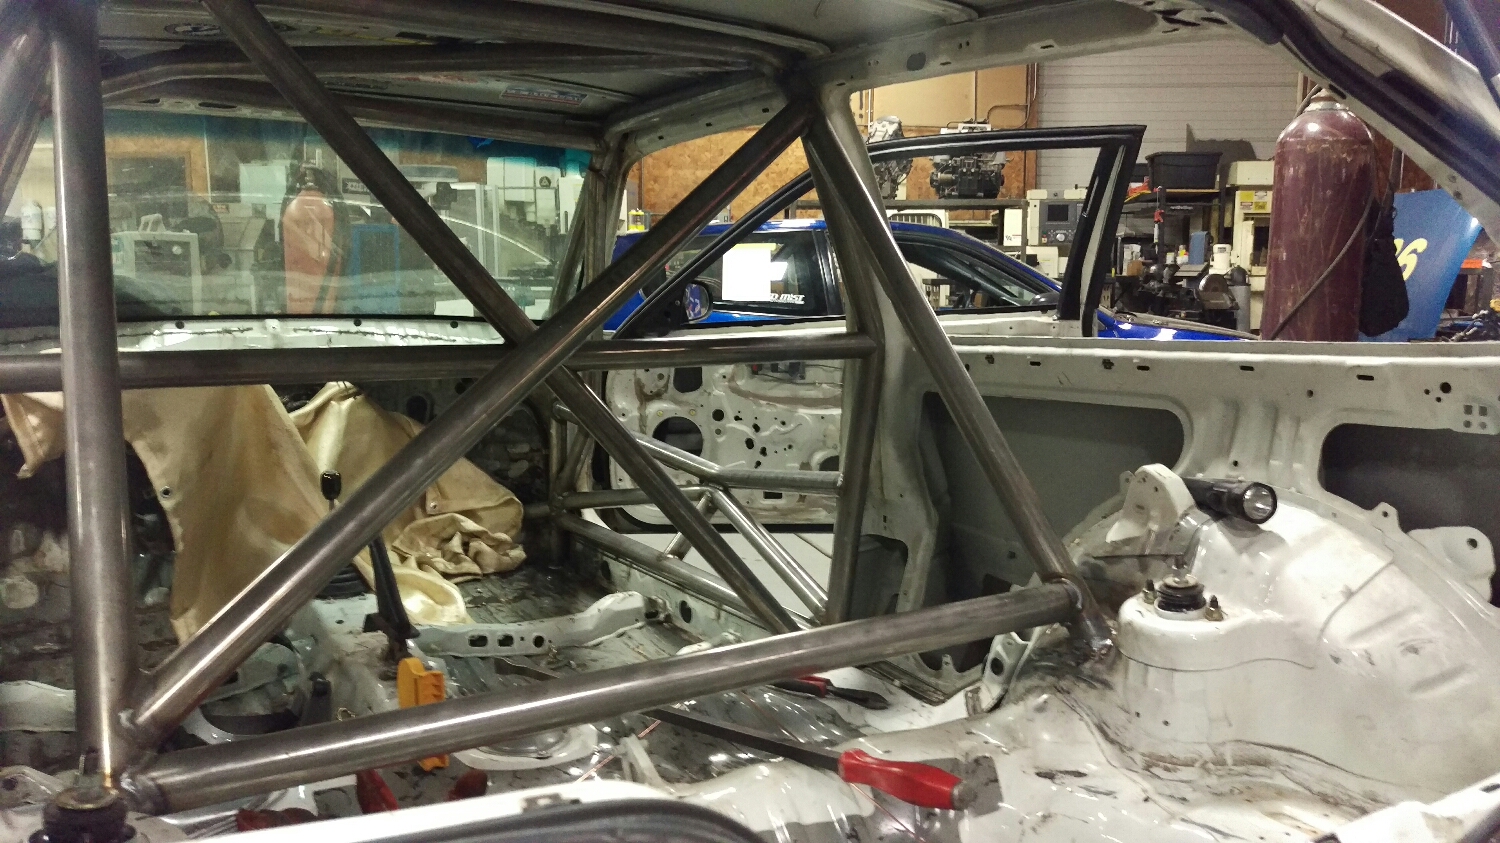
the rear shock towers are a good place to plant the rear downbars on these cars. strong, multi layered sheetmetal, and lots ofstructural gusseting lies in the shock tower area on most cars. and, the downtubes can be shorter. shorter is better. It is common for people to connect the lower areas of the shock tower intersection and the door bars as well, creating another load path and reinforcing the door bar. .
Proper benders are expensive (Pro Tools, JD2, etc), and they take practice to use....and practice means you are going to mess things up. Education costs money, and you either spend it on time, material and equipment, or bring your car to a pro. This really is as simple as that. You should not be doing a rollbar if you cannot do it correctly. Buy a bolt in, save your pennies, sell the bolt in when you have saved up a few thousand, and let a pro build something proper for you.


this shot shows the door bars, and how they protrude into the door cavity. they will be strong , yet also easy to live with with a lower height. some racecars use more of the door cavity and go higher up, but this will be a great track car, while also being legal for US racing series. This shot also shows how the downbars land at the shock towers, with the brace going between them. NASA doesn't allow the brace to be the landing point for the downbars, so keep that in mind.
Basic layout of a rollcage intended for racing is something you should spend a lot of time designing and planning. Do not just jump into this. Many message boards and forums have enormous threads dedicated to pictures of rollcages and to discussing the theory and execution of fabricating them. Read, look at pics, then read and look at more pics. Racecars find all sorts of things to hit out on the racetrack, including each other. Every year I spend a few minutes at an event somewhere and think "how did that car get up there!?". Racecars will find places to crash and things to hit that you'd never in your wildest dreams imagined were crash-into-able. Every time I build a rollbar or Rollcage setup (I'm not a pro), I spend more and more time thinking about how I want to lay things out and how the rollcage will survive a potential impact, from many directions. I visualize the car from overhead, and in 3D space, and mentally slide it into things in all directions, and think about how the cage will distribute the loads sustained from these impacts. Racecars can hit things hard, from anydirection, so with a full cage build, don't leave unsupported areas nowadays.

a small detail from the cage we did on brad Adams' HC2 car. His harness bar bends rearward, around the diagonal hoop brace, and we tied them together with this cute lil piece.
Cage design isn't always about throwing more steel at the car, but properly done, more bars and gussets can be better, obviously. Triangles are the strongest shapes in a roll cage as well, and thus, connecting "nodes", the points of intersection in tubing, can really stiffen and strengthen a build.

tight fitment to the B pillars is a good practice in cage design., as is tight roof fitment. Mike has done a great job fitting this setup in Nick's ancient Honda.

hugging the A pillar, and a upper cross brace to prevent the A pillar area from caving in on the driver...there is a lot to love about the upper portion of this car. and, maximum headroom was clearly a priority.
More steel and labor costs more. Simple as that.....but... more steel sometimes means the setup is difficult to exit and enter for the driver, and that is a giant issue as well. Why? Well....if exiting the car is difficult on a sunny day when you shut the car down and take your helmet off in the paddock, how tough is it going to be to exit the vehicle if something (or yourself) is on fire, and your helmet is on , and your head-and-neck restraint is still on , and cars might be zooming by you still because the corner worker didn't see it yet, and has yet to wave a yellow flag? Worst case scenario sometimes happens.

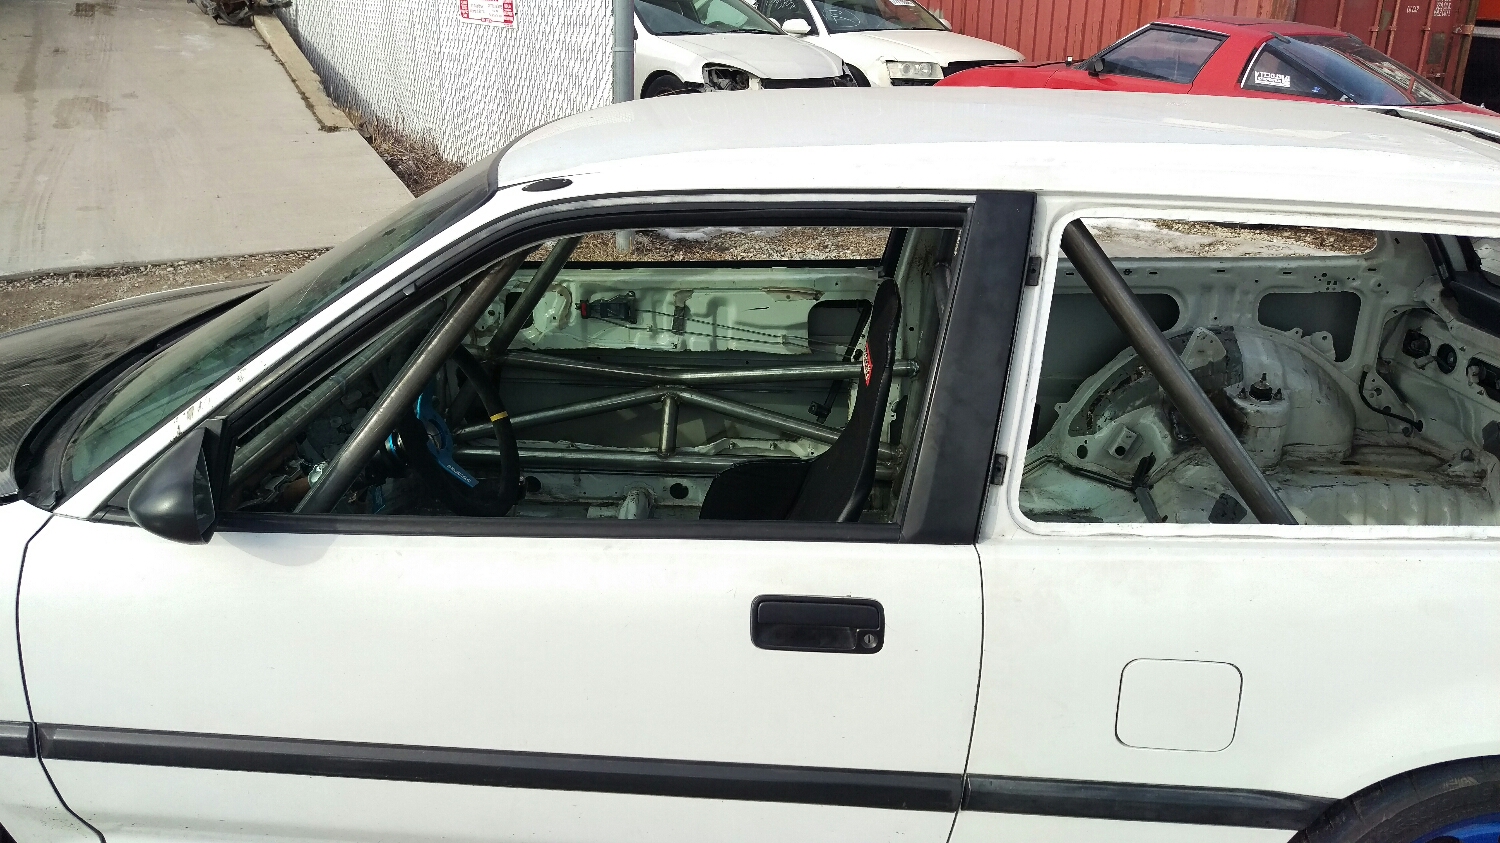
maximum hoop width was a goal of mine on this 1g crx track car it almost hits the glass, and only works with a gutted door

Christian Shipp's old ITA 4dr build is a favorite of mine. Look at all the connected node/load paths, the "tall guy" design of the hoop being further back, and really solid overall design. I should have bought this car.
Ease of entry and exit into the car MUST be a priority in my opinion. Fire is very real and very scary. Mid way through a build, before you get into the door bars, one should practice exiting the car, with the door closed and open, and be sure they aren't building a trap for themselves. Planning for an easy exit also results in a cage that is easy to live with!

lots of helmet room up here

zap zap. The harness bar is intersected on this cage by the diagonal roll hoop brace. The diagonal brace usually MUST be one piece, as Mike has done here. Don't multi-piece it and have the diagonal intersected by the harness bar, etc
Mike can be reached at Red Mist auto, 139 Industrial Dr, unit A, Gilberts, Illinois. 847-428-6610. Redmistauto.com . Shoot him a facebook message or call. Redmist also offers a huge variety of parts, and can do full builds and even tube chassis work. Mike himself is also a Nasa Tech Inspector, for your annual tech inspection needs.

ease of entry was a huge consideration on Brad Adam's cage . its about the easiest I've seen for slipping yourself into the seat. I did s sloping door bar to direct force downward , away from the driver. Nothing wild, but its the style I've been thinking of the last few years. The A pillar is also supported a bit with a brace to the door bar, slightly hidden in the dash.
If you've got roll cage or fabrication pics you'd like to share in future articles, send them to adam@tracktuned.com along with descriptions of the build, and we'll potentially use them in future articles! Thanks for reading.